Posts

Showing posts from June, 2015

Thrifty Thursday: DIY Folgers Containers
Image
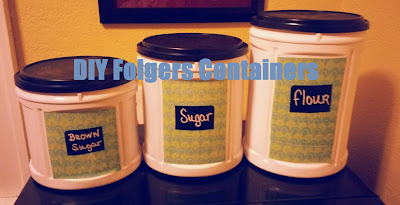
Happy Thursday! So a few weeks back I posted a trial called  Removing Printed Labels From Plastic , using Folgers containers that I recycled. In that post I told readers that I wanted to recreate the Pin below from Pinterest. The reason that I wanted to get the printed labels off of the containers first if possible because I was thinking of leaving them red. Unfortunately I was not able to use the acetone method to remove the label so I decided to paint them. Before: I was lucky to collect a small, medium, and large containers. Here is one below: I spray painted two of the containers first. I still had some of my trusty Rustoleum spray paint left so I used it up. Sadly I accidentally deleted the picture of the spray paint results so you just get a can of spray paint. ;) I wanted save the third container to paint with acrylic paint. I wasn't very confident on the paint sticking to the plastic well, but I like to try things out so I went with it. It turned o...

How To Do Wednesday: Fun Summer Fitness Activity Ideas

Image
In 2014, my New Years resolution was to become more fit. I am proud to stay that I have stuck with that and continued exercising regularly. While I don't always make it to the gym, I do exercise at home 4-5 days per week. Now, while I try to maintain a regular fitness routine, I just don't always have the time or energy to dedicate to a hard workout. If you work, have a family, or both I know you can relate. The list below applies to all ages and are activities that most of you have done before. For someone with a busy schedule, rotating these ideas would be a great way to stay fit and spend quality time with family or friends. Activities Hula Hooping Jumping Rope Walking or Hiking Jogging or Running Swimming Doing Yoga* Rollerskating/ Rollerblading Playing Tennis Playing Basketball Riding Bikes Doing Zumba* or Just Plain Dancing Cleaning Yard Work/ Gardening Skip-It (show the kids how it's done) *Great free videos available on YouTube **Do you have...

Trial Tuesday: Removing Scratches From Wood

Image
If you haven't figured it out by now, furniture is not made like it used to be. For this reason, when looking for wooden pieces I usually opt for the old, heavy wooden pieces over the plywood of today. So, when I look for furniture, it's typically at a thrift store or rummage sale. I take such pride in finding pieces and repurposing them. You can take something old and make it like new with a little effort. While repainting furniture can be fun, it is even better when you find a piece that just needs a good cleaning. So when I came across the Pin below, I was very curious to see if this technique worked. TRIAL What You Will Need 1/2 Cup Olive Oil 1/2 Cup Vinegar Wash Cloth Before Directions Mix vinegar and oil. Use a wash cloth to apply the mixture to your scratch. Repeat steps if necessary. After Results: FAIL Note that literally nothing happens. Now, while this scratch is pretty deep, isn't that the point? I did try thi...

Makeup Monday: Cheap Makeup Brush Review

Image
I recently purchased new synthetic makeup brushes on Amazon for $9.99 and I could not be happier! These brushes came directly from Amazon (not typical for the price) and were just as advertised. This set is perfect for daily use and you cannot beat the price! This is how the brushes looked when I received them: Below you can see a brush chart with numbers and purposes for each brush. Now, while brushes do have specific purposes, not all faces are the same shape or size so use what works. I like to clean my brushes every few weeks, so I always keep extras. I have not used all of the brushes from the set yet, but I can make a full face out of the ones that I have tried. Face Brushes F80- Liquid foundation F88- Bronzer F86- Loose powder F82- Blush Eyes Brushes P86- Crease (defining) P84- All over, lid P88- Blender Extra Brushes F84 P80 P82 My Opinion: I know that it will not last forever but I will get my money's worth in use; you ...

Thrifty Thursday: DIY Bird Feeder

Image
Recently, I came across this Pin on Pinterest which showed one way that you could repurpose a teacup and saucer: And I thought to myself, how adorable! I wanted to recreate this to add to my garden so I headed to the thrift store. What You Will Need: Teacup and Saucer Hot Glue or E-6000 Twine Spray Paint (optional) Unfortunately for me on the day that I went thrifting I could only find one teacup (pictured below), but it was only $0.25 for the set. I figured that I could spray paint them so I bought them. 1. Clean your dishes. Apply glue to the center of the plate. 2. Place your cup on the plate sideways, with the handle facing upward and hold firmly. And you should end up with something like this: Optional Step 3. Spray your cup with your spray paint color of choice. I had this white so I just used it. 4. Use twine to make a rope to hang your bird feeder. Use hot glue and wrap the twine for a secure hold. And you're done! ...

How To Do Wednesday: Money Saving Gardening Tips

Image
A few years ago, I bought a foreclosed home that was abandoned for at least a year. The property was owned by the city so I had a lot of work to do both inside and out. For the past few years, I have worked to transform my once abandoned property and I feel like it is finally coming together. A lot of the gardening tips that I have gotten over the years have come from plant professionals. I myself thought that I had a black thumb at once, but I was just doing it wrong. If you are interested in what I learned about gardening over the years, keep reading. Weed and Till At least one week before planting anything you should remove all weeds and till the soil. Remove all weeds at the root by using a small hand shovel or a butter knife. Tilling is the process of moving the soil around. The reason that you till is because soil erodes (breaks down), retains acid, and loses nutrients. After tilling, you can apply a layer of new soil with your plants to promote healthy growth. Inves...

Trial Tuesday: Hazy Headlight Hack

Image
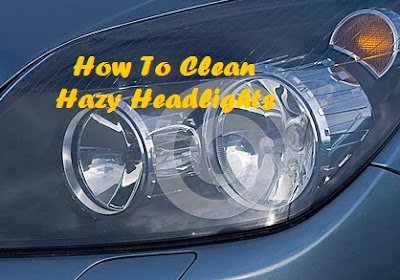
So, I will start by saying that my car has the MOST hazy headlights ever! I have no idea why and comparing other cars of the same model, I think that mine are just defective or something. For this reason, I am always looking for ways to clean my headlights. I have tried the store bought products and while they work for a bit, the shine never lasts. And, at $6 a bottle, it just seems like a waste of money. For this reason, I needed to find a hack to clean my headlights.I came across a Pin that said that you could use toothpaste to clean hazy headlights. I decided that I needed to put that to the test! What You Will Need Toothpaste A scrubbing pad (not scouring) Water Clean washcloth or paper towel Before 1. Apply toothpaste to your headlight. 2. Gently scrub the toothpaste all over the headlight. 3. Allow the toothpaste to sit for a few minutes. 4. Use the water and washcloth or paper towel to remove the toothpaste. After Result: PASS T...